Saturday, February 18, 2012
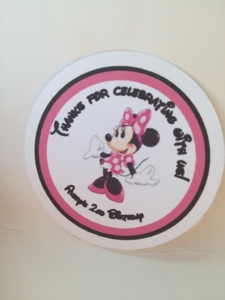
Minnie Mouse Tags and Owls Part II
I made another round of favor tags for Roxy's Sweet Treats. These were Minnie Mouse Tags, so I downloaded a Disney-style font to use. I also made another blue owl tag for a different owl party. Owls are so trendy right now. I have fun making these tags now that I really have my system down.
My first Pinterest Fail
Okay, so you win some and you lose some. I had my first Pinterest fail when trying to make the Valentine project below that I saw on Pinterest via http://cleanandscentsible.blogspot.com/2011/01/valentine-hand-print-canvas.html
Mine did not turn out quite that way. Trying to get a good handprint from my 15 month old was darn near impossible. Then, the edges I tried to paint came our blotchy. Not to mention that the red handprints just look creepy.
It's all part of the learning process I guess. One canvas down the drain.
Mine did not turn out quite that way. Trying to get a good handprint from my 15 month old was darn near impossible. Then, the edges I tried to paint came our blotchy. Not to mention that the red handprints just look creepy.
It's all part of the learning process I guess. One canvas down the drain.
Saturday, February 4, 2012
A Fun Idea for My Children's Growth Chart
I am a very sentimental person who is totally focused on cherishing the years while my children are growing up. Although I could purchase a large variety of growth charts, I loved the traditional idea of marking children's growth on a door jamb (or other convenient location.) I like the idea of seeing both children side by side and comparing their height. However, I wanted this special documentation to be on something that I can take with me when we move one day. The problem was that I kept procrastinating, and my kids were getting taller by the minute. I began to think it was too late to start a growth chart and that I had missed my chance.
I was thinking about it one day recently, and it occurred to me that I had records of their height measurements from their doctor visits over the years. Some were even written in their baby books. Then inspiration struck. I had to have a long board or something sitting around the house that I could make a growth chart out of. Sure enough, I had an extra slat from our fake wood blinds, and in no time at all it was transformed into a fun keepsake. Here is how I did it:
Materials:
-Something tall to use as a growth chart, at least 5 feet tall. I used an extra slat of our wood blinds.
-Spray paint
-Pencil
-Measuring tape
-Ruler
-Sharpie marker
-Sharpie Paint Pens
-Ribbon
-Hot glue
-Your children's height measurements over the years (I had saved records from the pediatrician)
 |
| These are the materials I used. |
 |
| Then I hot glued two pieces of black ribbon onto the back and tied them into a bow in order to hang the chart. |
 |
| At the bottom of the chart, I personalized it with my children's names and the quote "All Things Grow With Love" in decorative writing (using the paint pens.) There are tons of cute things that could be done at the bottom space. I was thinking decoupage, etc. In the end I decided that their names written in my own hand was a really nice personal touch that will someday be cherished. |
This was my first project that I came up with completely on my own, so I am really excited that my creative inspirations are finally starting to bring out my own creativity.
Subscribe to:
Posts (Atom)


